Nearly half of the US data centers planned for 2026 are getting delayed or canceled because nobody stockpiled enough transformers and circuit breakers
49
votes
If you want to see just the final result, check out my TiMaSoMo showcase post. This post does minimal amount of showcase of the final project, although it does include some pictures. If you want to see a showcase of the software, the original author has made a great video showcasing it that is worth checking out: YouTube videoBlogpost for those who prefer reading. Instead, this post is more a discussion of my experience developing a device.
The goal of this project was to create a dedicated audio player, to separate that capability from my phone. The main source of audio will be streaming Spotify, not local files. Although unfamiliar with them, I felt that a Raspberry Pi was a good baseline device. For audio, I had an old USB DAC/amp that I wanted to repurpose. Using this DAC/amp would allow for some of my harder to drive headphones to work, as well as just getting cleaner audio. Then, I was planning on just using an eInk touchscreen. The rationale for eInk was so that it would feel different than my phone, and just feel like it was intended for music instead of scrolling. The logic was if I put a regular LCD screen on, it would not differ from a smartphone, and therefore I might as well just connect my DAC to my phone and use that. For software, the plan was to just use either Android or some lightweight linux distro. The initial plan for batteries was to just use rechargeable AA batteries, so that I can easily swap them out. One major reason I wanted to go with the DIY route was for repairability, especially with batteries. If I got an existing Digital Audio Player (DAP) on the market, I knew that the Li-Ion battery would eventually go bad, and existing devices on the market may not be easily repairable.
My hardware approach was to buy one component at a time. That way, if I ran into an issue with the feasibility of the approach, I could pivot without having wasted money on all the components ahead of time. This approach did slow down development as I was frequently waiting on hardware, but was more fiscally responsible. In January I got a Raspberry Pi 3a+, and played around briefly with some different operating systems. The next part that was needed was to source the screen.
The original goal was to try and get a touch eInk screen, roughly 5” for a reasonable price. I spent a few weeks trying different places to try and find one, but could not find one. Since I could not find one I started thinking about pivoting to an LCD screen. With this pivot, I started defining goals of the project more. If I were to just use an LCD touchscreen potentially running Android, what makes it different from using my phone? I spent a few weeks trying to define the goals of the project, and was not able to come up with satisfactory answers if I went with an LCD screen.
In the process of trying to figure out my approach, I stumbled across this YouTube video. I felt like this would be a good starting point. It seemed to solve the issue of it not being another Android device, which was my main problem I was trying to solve. However there were a few parts of the implementation that I did not like:
Luckily, for the clickwheel, someone on the weekly programming project on Tildes pointed out this new clickwheel. Since that seemed to be a reasonable approach I ordered one and also got a small LCD screen from Amazon. Unfortunately, the screen used up all the GPIO pins and had non-existent documentation or drivers. I was unable to get the screen to work, so I returned it and ordered a Waveshare 2” LCD. I was intentional on finding one that could be a regular display without using too many GPIO pins. The Waveshare screen had significantly better documentation, and with a bit of work I was able to get it working. With that solved, I started wiring in the clickwheel, and creating basic code to detect basic inputs, which I then used to modify the original code for the Spotify player to handle my clickwheel (see below for comments on code modification). Once I had the screen and clickwheel, I could also develop the software while waiting for parts. Image showing the early iteration of the device
The last main part I had to solve was batteries. Another helpful comment on the weekly programming thread on Tildes told me about 14500 and 18650 batteries. I sourced a 14500 charger and some 14500 cells from Amazon. I had some issues with the first charger I got, and since they were shipping directly from China, it meant the second one would take another few weeks. Picture of using the 14500 battery. The cells I sourced said they were 2500 mAh. I tried one out, and had playtime of about 30mins, not enough to even listen to a full album on a single charge, which is inadequate. I used a portable battery bank rated at 10000 mAh to set a benchmark, and that lasted significantly longer (I was probably around 50% after about five hours or so of playback). This indicated that the 14500 cell was falsely claiming capacity, which is apparently a common issue on Amazon. It also seemed like 14500s rarely have capacity above 700mAh, so I realized that a 14500 would not work. So I decided to upgrade to an 18650 cell, which I could source the actual battery locally from a reputable vendor, with a capacity of 3400mAh. Since I realized that small hobbyist electronics like this on Amazon were shipping directly from China, I started ordering from AliExpress for the charger, which saved me some money for the same part (and even picked up a spare just in case). Picture of me using the 18650 to listen to music on my balcony during the summer. Since I did not need the extra power of the RPi 3a+, and the battery was taking more space, I ordered a RPi Zero 2w+. I also ordered some micro USB ends to solder to to make internal cabling, as well as a USB-C port to use for charging. By May I had all the hardware parts I needed, and all that was left for hardware was to design a case to 3D print, which is detailed below.
The first thing I tested was installing Raspotify which this project used, and set it up with my DAC. Since that worked, I started to program the clickwheel using GPIO pins. I had never used a RPi before, but found some easy tutorials on programming the buttons of my clickwheel in Python. Once the buttons were programmed, I had to figure out the rotary encoder, but was able to find a Github repo that had a working Python code to process the inputs. I was able to add that, and created a Python class that would handle all the inputs of my clickwheel. Once that was coded, I just had to incorporate that into the code for the Spotify player frontend. I forked the repo, and was greeted with at the top of the main file this comment:
# This code is a mess.
# This is me learning Python as I go.
# This is not how I write code for my day job.”
This was not an encouraging comment to read, as at the start my Python skills were relatively low. I was able to quickly find where the inputs from the clickwheel were being handled. The original code had clickwheel inputs being handled in a separate C program and then communicating to the Spotify frontend via sockets. Since my clickwheel code was handled via a Python class I was able to simplify it, and not require sockets to be used. With that working, I just had to set up all the required steps to get the project working. Unfortunately, the documentation for deployment was extremely lacking. I was able to find a Github issues post that provided instructions so was able to get it all set up. I was able to get to this phase by the end of March.
Once I had it all working, I could start on expanding the software to fit my use case as well as start working on any bugs I encounter. I felt a good starting point in handling this was to start addressing the issue of “this code is a mess.” Cleaning up the code would be a good way to gain familiarity with the code as well as make it easier for me to address any bugs or future enhancements. I started work on creating a class diagram, but it was really tedious to do it from scratch with such a large codebase, so I deserted that plan quickly. I am thinking of creating some sequence diagrams from some features I implemented recently, which would help in general documentation to refer back to in the future. I did find some classes that would make more sense in separate files, so did do that. I also started adding in new features as well. The first was to implement a “hold switch” which turns off the screen and disables the clickwheel input. Before, the screen would be on a 60sec timer to turn off, but I felt that sometimes I would want to have the screen stay on (like if I am just sitting in a chair listening to music). This was a relatively easy feature to implement. One bug that kept on appearing is that the screen would frequently freeze on me, normally about 60sec into a song, but would update once the next song started playing. I spent several weeks tracking down this issue, thinking it was software related, as the screen used to timeout after 60sec. I also thought it might be a configuration of my OS, so did some debugging there as well. Finally, I plugged in my main desktop monitor, and realized when the small 2” screen would freeze, my desktop monitor would not. This lead me down to investigating the driver for my screen. I found an issue with someone having similar issues with the original driver that Waveshare forked. I then realized that there was a setting that the screen would stop updating if less than 5% of the pixels were changing. Once I changed that in the config file, the screen freezing issue stopped. I was able to solve this major issue by late July.
The last major feature I have implemented is to create the ability to add new WiFi networks from the app itself. This was a needed feature if I wanted to bring it anywhere outside of my home, since 3rd Party Spotify apps cannot download music. Luckily, there was a search feature, which gave me a baseline for text input using the clickwheel. I was able to create a basic page that prompts for the input of a SSID and the password, and then adds that to /etc/wpa_supplicant/wpa_supplicant.conf and then restarts the wireless interface. I added this feature into the overall settings page I added, which also included other useful dev options, like doing a git pull for me to avoid having to SSH into the Rpi to do it. The settings page features were a part of my project for TiMaSoMo.
I started work on the case in late May roughly. The plan was that I was going to design the case and have my friend who owns a 3D printer print out my design for me. To continue with the project goal of repairability, I wanted to avoid using glue for the case. Instead, I wanted to use heated inserts to hold all the components. I had not used any 3D modeling or CAD software before, so it was a learning experience. I settled on using FreeCAD, which I was able to learn the basics of what I needed relatively quickly. I started with a basic case design for a prototype, to help plan out how I would lay things out. On my computer screen, having the device be 40mm thick sounded fine, but after receiving the prototype I realized I would need to be aggressive in thinning out the design. However, this protoype in early June was very helpful in getting a better understanding of how I needed to design it. Case prototype pictures.
The first iteration I was able to get down to 27mm, which was a significant improvement. I received this iteration in mid July. However, there were parts that did not fit properly. Most of the mounting holes were not aligned properly. However, the bigger issue was that at 27mm the device would not be thick enough to hold the DAC and screen stacked on top of each other. This iteration still had the DAC keep the original metal housing, so that I could easily remove it and use it as originally intended if I did not want to continue using my audio player. First case iteration pictures.
The second iteration I decided to remove the metal housing of the DAC, which freed up a lot of internal space, with the main limiting factor of thickness being the 18650 battery. So I kept the thickness around 27mm, but had more internal space. Removing the metal case of the DAC was relatively straightforward, except figuring out how to secure it to the print. Luckily, there were two roughly 2.5mm holes in the PCB, that I was able to use to secure it. I also started to do a more complex design, since I was getting more experienced with FreeCAD. I also moved the RPi to the top of the case, so that the two parts of the case could easily separate, with only micro USB connectors being used between the parts in the top and bottom part of the case(Picture of third iteration showing this feature). For anyone who has had to repair electronics that did not fully separate due to ribbon cables (laptops are the worst for this it seems), you understand the quality of life improvement of having the two parts easily separate. I got this iteration of the case in early September, and found a few issues of parts conflicting. However, with the use of a dremel, I was able to modify it to get it to roughly fit (although janky in some parts).In this picture you can see the power switch, which I had to modify to sit outside the case. I wanted to fully assemble it, so that I could start using it and figure out where it needs to improve. The biggest issue aside from conflicting parts was that the top of the case was bulging, so I wanted to add another point of connection to prevent it. This bulge was partly caused by the screen cutout causing a weak point in the top of the case. Second case iteration pictures.
The third iteration was part of my TiMaSoMo project. This was a relatively simple minor tweaks, as well as fix some minor pain points of the previous iteration. I reinforced the top significantly to prevent bending, as well as add a fifth point to secure it. I also added a recess to make accessing the switches for power and hold easier to use (although I think I messed up the hold switch one). Overall, this print worked well, and there is currently no plans for a fourth iteration. Fourth iteration pictures.
Here is all four cases compared side by side
The first lesson I had to learn was how to define project goals. Not being able to source an eInk screen had caused me to pivot, and in doing so I had to reflect on what truly mattered for my project. I knew that DAPs existed, so why build my own rather than buy one? Most DAPs on the market seem to be Android devices where they removed the phone functionality and added in quality audio components. Part of a dedicated audio device was to not have my phone be the everything device that they are, but a second Android device with an LCD screen and better audio components is not the solution. Luckily, I encountered the clickwheel based approach, which did solve that issue (and probably better than an eInk would have). Also, I wanted the device to be easily repairable. Li-Ion batteries go bad, which was another major concern for me with the current options of DAPs. Repairability was something that mattered to me, but I had to embrace what that meant for the form factor. If I went with a non-descript Li-Ion pillow battery, I could probably significantly reduce the size. Understanding that I wanted to avoid just being another Android device and have repairability and replaceable parts as the defining features were useful to keep in mind. That approach did result in compromise though, primarily in physical size at the end.
The second big thing I learned was just the process of sourcing parts for a project like this. The closest project to this that I have done in the past is create a DIY cable tester. That simply just involved some switches, resistors, LEDs, and some AA batteries that I could all source locally. So having to buy more complex electronics where the documentation mattered was a learning curve for me. Luckily, early on I was ordering from Amazon, where returns were relatively easy. The problem with Amazon though was false advertising for batteries and some components were shipping directly from China. So, switching to AliExpress saved me money without adding any additional in shipping.
Learning 3D modelling and getting stuff 3D printed was also a huge learning curve for me. I am glad that I got a very rough prototype printed early on in the process. In designing the prototype, I just was not concerned about saving space. However, once the prototype was printed and off my screen and into my hand, I realized how aggressive I needed to be in compacting things. The other thing with using FreeCAD is I learned too late in the process about part hierarchies, and I still do not fully understand them. Not using part hierarchies properly led me to have to do a redesign on each iteration, as moving mounting holes over a few mm would shift every part added after it. Luckily, my designs were relatively simple, but having hierarchies handled properly would have helped me iterate quicker. On top of getting prototypes in hand quickly, using imperfect prints and just adjusting the parts that didn’t work with with a dremel was useful. If I didn’t do that with the second iteration, I would not have dealt with the issue that the top of the case would bend out over time. Spending time using the imperfect device helped me figure out the issues to make the next iteration better.
The first goal I will add in future expansion is to add better documentation and create a better development workflow. Right now, my process includes pushing any changes I do (luckily I am using Github branches now), then pulling the updated repo and starting it on my Pi. However, I never test if it compiles properly before pushing, so I end up sometimes doing five pushes in ten minutes, playing whackamole with compilation errors. Being able to run a dev version on my desktop with keyboard emulation for inputs would be beneficial.
Another big issue that I want to solve is that I need to clean up the audio on lower resistance headphones like my IEMs. There appears to be some electrical noise, that only sensitive devices like IEMs detect. The solution I am currently considering is to add in a capacitor on the voltage rail between the Pi and the DAC to hopefully get cleaner power.
Another issue is that I currently have no indicator of battery life. Since it is an 18650 Li-Ion battery, I should be able to just detect the gradual decrease in voltage, and calculate battery percentage. However, GPIO pins appear to be unable to do that natively, so I may have to add in a small controller board to do it. I have not looked too much into this.
There are a few UI/UX decisions that do not match my preferred way of listening to music. So over time I plan on gradually tweaking the UI/UX to match what I want it to be. A prime example of this would be that when I select an artist, I want it to present a list of their albums, instead of playing their most popular songs.
I want to be able to use Spotify Lossless, since that has rolled out near the end of this project. Unfortunately, it seems that currently it will not be supported. Seems like Librespot (which is the basis for Raspotify) does not currently have a solution that does not involve working around Spotify’s DRM.
Overall, I am really glad I took on this project. It took a long time for me to get it to a finished state. However, the experience has been really fun, and I have learned some new skills. Also, having a dedicated device that all it does is stream Spotify is really nice. I always found myself whenever I was listening to music ending up scrolling on my phone for a bit more stimulation, and then realized I have not been paying attention for the past couple of songs. Having a device where all I do is just listen to music and leave my phone behind has been nice. Also, modifying the code to fit my preferred use case has been nice. There are points where I realize I do not like how something is laid out, but then I have agency to change the layout. Here are some pictures of the final device.
If you want to build the device yourself, I will warn you that it has some rough edges. Also, the DAC/amp is discontinued, so sourcing that to fit inside the case would be tricky. However, my Github repo has all hardware listed, the code needed, and easy to follow software deployment instructions.
I like to periodically audit my home computer infrastructure for upgrades/replacements. Mostly this is so I don't have to make an impulse purchase when something inevitably fails, but it's also nice to keep up to date on the state of the art.
I'm currently trying to reassess my home home networking, and I am a bit overwhelmed by everything. So I'm hoping that the residents of Tildes can help me out a bit with recommendations.
I would classify myself as a fairly budget consumer. I'm on a less than 1Gbit Xfinity plan, and have mostly cobbled together my current system from collected parts over the years. My DNS/DHCP is handled by my primary router, an aging T-Mobile Asus device I picked up years ago and loaded with Merlin. A few years ago I picked up an Eero system on discount, and I have been using that in bridge mode to provide mesh Wifi around the house.
The system I have in place is working great. It occurs to me though, that most of the parts are getting old enough that I can't replace them directly. I'm definitely not going to be able to find my specific router easily, and the first gen Eeros are also getting harder to find. I also think I might not be doing myself any favors with the chain of multiple devices being cobbled together. Perhaps it's time to look for a mesh system with the flexibility that my Asus/merlin router offers.
So let's hear it. What sort of networking equipment is everyone using these days? What do you like about it? Any killer features that I have been missing while living under a rock?
Hi Tildes,
I'm looking to introduce my children (aged 10 or so) to simple electronics (blinking lights, simple sensors, ...). I've played with Arduino in the past, but I see that there are now many competing options: Arduino, cheap rip-offs, RPi zero, adafruit, ESP32, ... It's easy to get lost!
Which do you recommend? Ideally, I'd like something cross-platform and open-source, easy to set up (ideally a kit with everything included), and of course not insanely expensive.
Edit: thanks everyone for the good advice! There are so many good options...
I recently came across a cool video on youtube. https://www.youtube.com/watch?v=dxj8JwdQ7Lk&feature=youtu.be - The guy added a 4g connector to his rc plane and I think some extra batteries and managed to fly to the next island over.
I love stuff like this. Do you guys know any other current electronics that can be modded like this? Sadly it seems like most new consumer electronics come with their own small walled garden and often enough stuff just stops working once the seller goes bankrupt.
Other things that come to mind are:
Raspberry Pi
Arduino
ESP
But do you guys know whole systems that are moddable like this?
The Ryze Tello is a programmable drone, which is pretty cool as well.
I also saw some people modding 3d printers to laser cutters
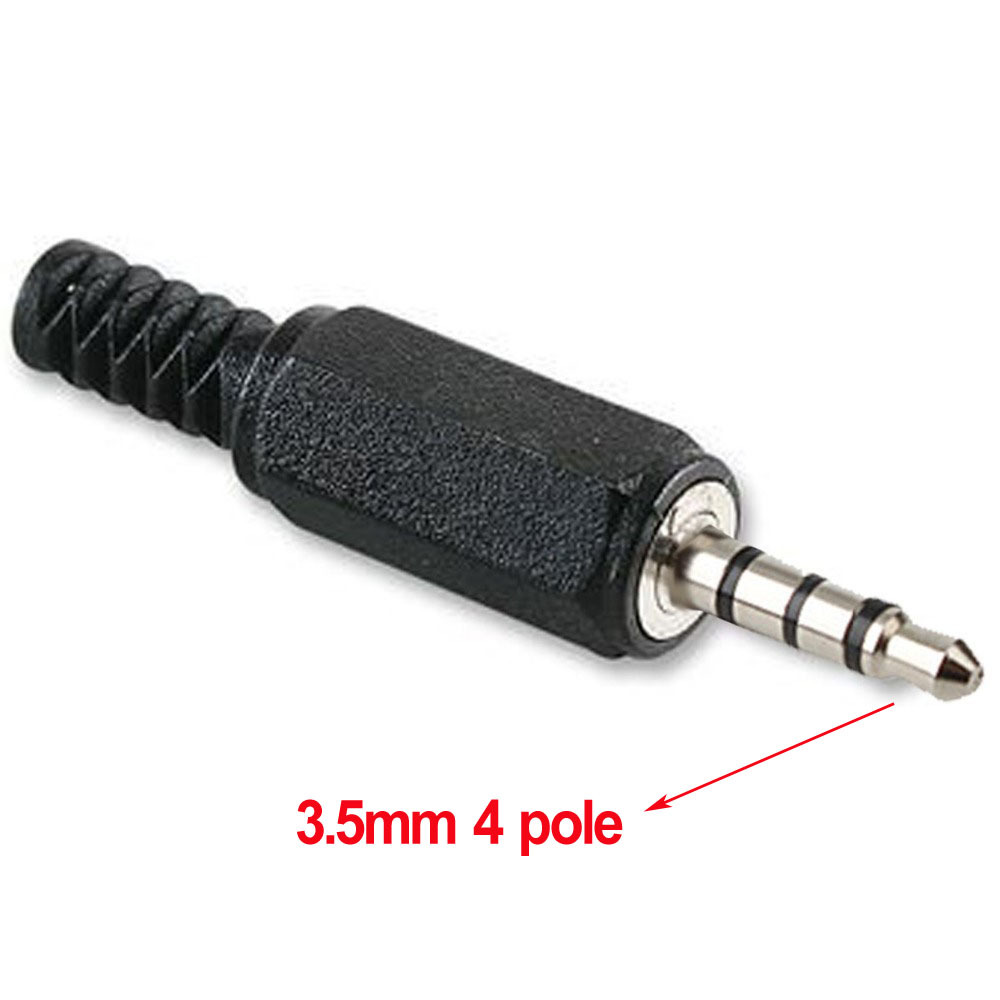
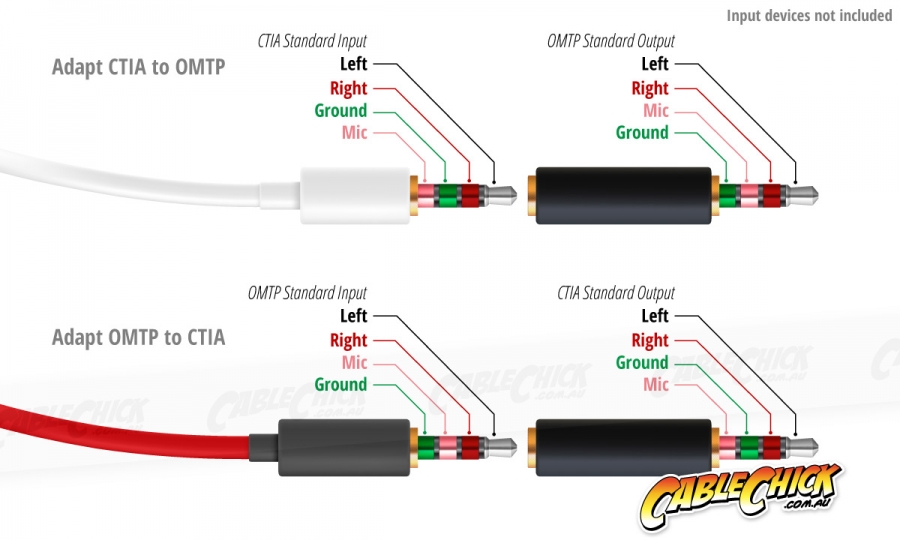
To summarize, I am annoyed that there are two different standard for 4-pole audio connectors. For those curious I mean this.
You have OMTP and CTIA, the difference is they swap the mic and ground pins. This is irritating because Apple vs Android use them differently. This becomes especially annoying when you want a feature like an inline mic mute switch (one designed for CTIA for example will disconnect the ground pin on OMTP instead of mic)
This has been an ongoing frustration for me for a while. I really enjoy a good pair of headphones because I use Discord and I work from home which necessitates using headphones for extended periods of time to listen to music, take calls, chat on discord.
I just want there to be a device that does OMTP/CTIA swapping AND include the ability to physically mute the mic. Like this but with something that will break the mic pin. Im currently designing something in fritzing that will allow both direction switching as well as selective muting.
/rant
Has anyone else had any similar experience or frustration with this problem?