Announcing web serial support in Firefox 151
42
votes
This weekend, I've fulfilled a long dream of mine and upgraded my computer to a fully custom waterloop. This is, for a number of a reasons, a complicated process, and outside of general advice, it's difficult to provide an exact guide on how to do this. Custom waterloops are, well, custom. They depend mostly on what computer case you use, and what sort of reservoir and such you've bought. As such, my advice can also only be general.
Check online for custom watercooling builds in your case. Use those as a guide for radiator and reservoir placement. Sketch ideas out on paper. Measure out the places inside of your case where you intend to place components. Check the your pc case manual, those very often contain info on where you can place radiators and reservoirs.
Some cases are ill-suited for custom waterloops. Consider buying a new case rather than building in an old, ill-suited one. It will save you a lot of pain.
Some cases require modifications. I had to cut into mine with a metal saw to make space for a radiator. Minimal material was removed from the frame, invisible after the case is put back together. I also had to drill into it to place the reservoir. The holes case manufacturers place for reservoirs are best-effort guesses. Unlike for fans, and thus radiators, there are no standards for reservoirs.
Expect a marathon, not a sprint. There will be setbacks. My process, setbacks and all, took me 3 days. And I still fucked up assembling my GPU. The die has bad contact and I'll have to drain the loop, pull it out, disassemble it and put it back together again. A lot of this was also spent waiting for next-day deliveries to show up because I'm dumb and was missing things.
There are no performance benefits to hardline tubes, and they are a bitch to measure, bend and cut precisely. That 95° angle that was meant to be a 90° is going to be evident immediately, and forever. Soft tubes are forgiving, easy to put into the system and much more time efficient. They also do not require extra equipment dedicated solely to bending hardline tubes. Think about where your build is going to sit. On the floor? Who gives a shit how it looks?
Edit: if you opt for soft tubes, don't get them made from PVC. They very often leak plasticizers into the loop that gunk up your components and reduce performance. You'll need to swap them after some time and they also tend to harden. To minimize maintenance, go for EPDM tubing. It's black instead of transparent, but it's better in the long term.
Custom waterloops are all about you, and if you insist, then you do you. Hardline tubes are the endboss of all pc builds. Be ready for a challenge. Conversely, some folks really want transparent soft tubes. Just know what you're getting into.
The standard soft tube is 13 mm outer diameter and 10 mm inner diameter, or 13/10. There's a ton of other sizes as well but remember even if the inner diameter is larger, liquid flow improvemets are going to be marginal. Different sizes also need different fittings.
Soft tubing is a breeze to put into your system, but don't make those corners too tight or it'll crink and cut off flow. Check this especially when you close up the panels of your pc case. Tubing is cheap, comparatively. Don't be afraid to use more than you need.
Custom water loops are pricey. Full copper radiators start at 100€, water blocks are usually hundreds as well, with the tubing, fittings and all it's normal for cooling equipment alone to account for a grand. You're bolting an aftermarket cooling system onto your PC that will turn it into a racecar. A lot of that is finely machined copper. It costs.
Ya know how I said that I needed to order some extra things last-minute? Thank fuck for Amazon and their fast deliveries. If you live in a larger city, there's also a good chance a specialist computer store somewhere might have what you need.
Those are small air pumps with a pressure gauge. You close of all ports and then pump air into the system, 0.5 bar maximum (!!!), and wait 60 minutes. If the pressure is maintained, congratulations, your system is air- and thus watertight.
Test your individual components before you put them into your case! This way, you know that the components themselves are tight, and you avoid having to pull out a radiator after screwing it in place because you forgot to tighten that one end cap you can now no longer reach. Ask me how I know.
Also test our loop when it's fully assembled. Should you have a leak, divide your loop into two halves and leak test those. Repeat (divide into halves and test) until you have located the leak. If you have tested your comps individually before, it's going to be a radiator fitting you forgot to tighten or your reservoir top 99% of the time. Have a book or a podcast ready because this is a long process with lots of downtime.
These nifty little things are incredibly cheap and useful. After you wire everything up, you want to fill your reservoir and turn on the pump, but obviously you do not want to immediately electrify your entire system. So you pull the 24-pin motherboard cable of your motherboard and put the plug into it. It bridges specific pins, tricking your power supply into thinking a motherboard is connected. This way your pump turns on without the rest of your system. Once the water is circulating and not catastrophes have occured, you can turn off your power supply and plug the mobo back in.
This is advice that's often repeated in watercooling circles for beginners. If you're seriously considering doing this, you will likely already have stumbled upon these. I'm adding these just for posterity.
Cheaper watercooling components are often out of aluminium while pricier ones are out of copper. You do not want both in your system as they eat each other through galvanic corrosion. If your cooling blocks for the GPU and CPU use copper (they very often do), the rest needs to be out of copper or brass as well, fittings included!
Remember, per tube you'll need at least two! Check that they have O-rings, as those provide the seal.
You should generally drain and flush the loop at least once a year. This will be a lot easier if on low points you have faucet you can attach a tube to and open to drain it. Pulling the loop back apart is generally the last thing people think off when building a custom loop for the first time, so it's useful to know.
Quick disconnects are special fittings you can put into a tube or attach directly to a port. You can then pull them apart with minimal or no leakage of your cooling fluid without having to drain your loop. Really useful for example the GPU, which tends to be the component that's swapped out most often.
Obviously no fucking tap water, ever! But lots of folks also gravitate to distilled water. Cooling fluids like what Alphacool or Aquacomputer make have extra stuff in them, like corrosion inhibitors and biocides that prevent algae build up. You can also mix these yourself if you can get the inhibitors and biocides concentrated but if you're on that level I don't think you need this guide anymore.
Also, colored liquid fucking sucks. Unless you want to pull apart your water blocks and clean them with a toothbrush, use clear liquids. If you want fun colors, put RGB into your case.
The two components generating the most heat in your PC are likely the CPU and GPU. Check the specs of those to see how much heat they generate. This number is generally known as the Thermal Design Point (TDP). Radiators come in many sizes fitted to fan sizes, mostly in multiples of 120 or 140 mm, but running this calculation gives you a baseline for how much radiators you need. More is always better! Fit in as many radiators as you can into your case, but if your case can't fit the number of this calculation then you need to look for a bigger case.
Knowing the TDP is rarer for GPUs, you can also use board power or power draw as a substitute. We're doing napkin math here, no need to be precise.
Example:
CPU: 170 W
GPU: 300 W
-> round up to 500 W, which means 5 * 120 = 600. A 360 mm radiator fits 3 120 mm fans. You'd need 2 radiators with 3 fans each to cool your system adequately.
Alternatively, a 280 mm radiator fits 2 140 mm fans. You'd need 3 of those to cool the system.
Radiators come in different thicknesses. Since what dictates a radiator's ability to dissipate heat is the total surface of it's fins, increasing the thickness improves cooling ability. However, most PC cases, even full towers, are practically limited to 45 cm rad height at most.
A big motivation for doing this was noise. Cooling everything with a custom loop means that I've lost the 2 fans on my CPU air cooler and the 3 fans on my GPU. What remains are the case fans only, 2x180 mm ones and 3x140 mm. Those can now run at dramatically lower speeds (10% fan speed at idle, ramping up much more slowly) for a nearly silent build even under full load. The pump and reservoir combo I've chosen are isolated from the pc case through rubber standoffs which means that the pump, even when at 100%, runs dead-silent.
Switching to a custom loop alone is a massive bonus to the computer's ability to be cooled, because water is a much more efficient way to move heat than air. Case radiators also have much more volume than the heat sinks on your GPU and CPU right now, improving the cooling further.
Once you step into this world, the choices open to you are staggering. Delidding the CPU. Using liquid metal instead of thermal paste, etc. etc. Unless you're planning on overclocking your system, there's no point to doing any of those things that are actively dangerous.
Liquid metal buys you a couple of degrees °C at best, at the cost of being dangerous and difficult to apply and even a tiny escaped drop having the ability to short and fry your GPU for good.
Delidding your CPU is only useful if you plan to overclock. I did it, but only because the company Thermal Grizzly sells delidded CPUs and a fitting water cooling block. If you're doing it at home, the investment is way too large to make sense. Delidding also requires liquid metal afterwards. See paragraph above for that.
If you're in this just because you want a high performing system at less noise, then using a PTM material instead of thermal paste is going to be good enough.
All of these improvements lower temperatures of your components. Delidding the CPU and cooling it directly buys you something like 20°C under load. But the thing is, a good water cooling loop can absolutely cope with a high performance CPU running at 100 per cent. With the IHS on it'll just push 80°C instead of 60°C.
Functionally, there's no difference if the CPU runs at 60°C or 80°C. The only time it matters if if you're over clocking and through that causing the CPU to approach its thermal limit. Then dropping it by a few degrees makes sense.
If not? Skip them.
I hope these help people. Feel free to ask any questions!
Edits in no particular order:
PC custom water cooling loops are not car engines, and as such the thermal differences between coolant and components is much smaller. This means that having a radiator follow a component to immediately cool the water down is much less effective than just adding more rad volume. It also tends to make your tube runs messier and is overall not worth it.
I caught wind of the BC-250 after the Linux on PS5 post where @moocow1452 posted about them and shared a link. The BC-250 is an APU cut down from PS5s that didn't pass Sony QC, they were originally slated for waste but largely got picked up by crypto miners. I hadn't got myself anything for my birthday or promotion, so when I found a deal, I grabbed it for the HTPC I'd wanted but couldn't justify. (Long post, tl;dr at end)
Specs:
6-core AMD Zen 2, stock clock 3.5GHz
AMD custom GPU, stock clock 1.5GHz*
16GB unified GDDR6 RAM+VRAM
M.2 2280 slot
*Stock lock is weird and limited, will discuss
I'm not sure exactly when they got proper Linux support or folks started using them for gaming but I'm definitely behind the curve. You used to be able to get them <$100 but now they seem to be going for $180. I found a "pre build" for $275 shipped that had it ready to go, including a case, cooling, PSU, 256GB SSD, and unlocked BIOS... this isn't too far from what I would've totalled had I gotten the board for ~$80, and saved me some headaches. While the seller pre installed Bazzite, no way was I trusting the OS installed by a random eBay seller.
So what's it take to make one of these usable, what trouble did the seller save me? Let's start with the BIOS -- this needs to be unlocked by flashing though I'm not totally sure if it's required to use it at all but at the very least it unlocks the dynamic 512mb VRAM. 16GB total is kinda limiting today and the default split is 8/8 RAM/VRAM -- a static split isn't exactly ideal -- depending on your game, you could easily be maxing out one with unused of the other. The dynamic 512 reserves only 512mb for the GPU alone and allows the rest to be properly split as needed (mostly, there's still technically a VRAM cap that can be raised with kernel parameters).
OK next saved headache was the cooling. See, these were built as server units with fans set to blow air through them. The heat sink fins are closed off on the top. One can print a sleeve to have a standard fan push air through, but opening the fins up and letting the fan push air through from the middle is more effective, more like your typical consumer GPU. Seller did a messy job, but it is opened in the middle. Some folks use 2 fans and fully open the fins for a cooler/quieter build.
The final headache was minor but they saved me from sorting out the PSU and power button. Since the board is powered just by 8 pin PCIE, for this PSU, two pins on another header need to be shorted to stay powered on, seller already had this in place. Seller also soldered power and reset buttons to the board.
So with the hardware sorted, what does the software end look like? While it can technically run Windows, but it does not and will not have GPU drivers -- though folks have added external GPUs. The main 2 OS options folks recommend are Bazzite and CachyOS. Folks say Cachy is better but benchmarks I saw weren't that compelling, I already use Bazzite and it seemed to have less extra steps so I went with that, standard installation process went smooth and it was basically ready to go from there... So why am I futzing around so much?
Well, the dynamic VRAM can collide with the default ZRAM swap, causing crashes and other errors. So I went through disabling that, enabling ZSWAP, then tweaking config and kernel parameters according to community info. So part of my futzing was comparing speed and stability with the various RAM settings and swaps.
So the next futzing was the GPU clock. The stock is locked at 1.5GHz over 920mV always no matter if load is high or low, but PS5 runs em around 2.3GHz and higher volts. There's a community governor that can decrease volts/clocks under light load and unlock the stock. Folks easily get 2.0GHz at 1000mV but some push 2200+ at 1150. So testing with that was more futzing around, playing in Expedition 33 for half an hour to see if settings were stable. I found the defaults to be fairly aggressive, causing artifacts and crashing. I disabled all their default points over 920mV, set one at 2.0/1000, and called it a day. Didn't feel like trying to squeeze out another 100MHz. Also boosted the bottom 700mV point up by 20 since I saw some graphical artifacts at low loads and that cleaned those up. (<700 locks it right back to stock parameters so that's the effective minimum)
Next up is the CPU, stock has it at 3.5GHz at 1180mV. Folks have been able to get the same clock down to 1000mV, some mad lads pushing 4.1GHz and like 1.3V. There's another community tool for helping with this where you punch in a target clock, voltage, and temp, then it tests it out. I haven't settled this one out, I may go for a bit of an under volt to help keep it quieter/cooler since it's an HTPC, or may just leave it at stock. Folks also recommend disabling mitigations for Spectre/Meltdown as it significantly slows the CPU and you're fairly unlikely to need it for a DIY Steam Machine.
So I was stumbling through this following the community wiki, it had some good and useful info, but it didn't seem entirely consistent and sometimes was just wrong. Turns out, it's an AI compilation of community info. I'd have saved myself a ton of trouble if I'd found this repo and followed their instructions as that's what I eventually found worked best.
Expedition 33 was my main real world benchmark tool. With FSR+LSFG on medium, I was hitting 1440p@90fps, 1080p@45fps without. The site compares it to a 3060, I thought that was mine until I double checked and have a 3070. It does E33 with DLSS+LSFG at 1440p@120fps cap on medium, or 1080p@60-70fps without either. So while the .info site seems to accurately describe the GPU as similar to a 3060, their benchmarks seem to include scaling and/or frame gen based on my limited testing. However, E33 still looked bad and off compared to my Nvidia at the same settings. After a day of fiddling, I looked it up and turns out, E33 specifically looks worse on AMD.
As for HTPC apps, Jellyfin flatpak works great. Official Plex apps are deprecated, both flatpak and snap, they run terribly. Girens (unofficial Plex client flatpak) seems to work well, but requires a mouse and sub menus don't work in big picture. I plan on using a PS4 controller (touchpad works as trackpad) for the time being so this isn't too big a deal, but it's definitely less polished than the Plex smart TV app. VLC with the network drive mapped so we can play direct from file as back-up. And finally VacuumTube for YT smart TV interface with ad blocking. Hardware encoding/decoding does not work and will not so it's all done by the CPU, but it was enough for my high bitrate 4k HEVC decoding test.
It doesn't have proper sleep states. Can't wake from USB/LAN, power button only, and doesn't actually sleep CPU/GPU so it doesn't really save power in sleep. Shutdown/cold boot is inconvenient for a daily use HTPC. Estimated 60W at idle, about $6 a month left on 24/7 for us, perhaps an extra $50/yr compared to a box with proper sleep. However, most it can pull under load is 235W, less than a typical gaming PC. Not enough to realistically break even versus a gaming PC with proper sleep though, so it's probably an expense worth considering in comparison shopping for a similar usage.
Final Verdict: do I recommend it? Honestly, if you're getting bare board for $180, maybe not, but also depends on who I'm recommending to. I seen someone on the discord selling them for $150, others may be selling too, perhaps prebuilts even. Between case, fan, PSU, and SSD you're ending up closer to $400 for a running build -- and that's before wifi/Bluetooth/controller if you don't have extras of those already. At that rate, you may be better off getting a mini PC + eGPU dock + older graphics card, but I'd need to shop around to see how their price:performance ratio compares. On top of that, you'll likely need to do the trouble the seller saved me. Getting the software going is fairly simple nowadays though, so long as you have the foreknowledge to just use NexGen's repo. If you're curious, do some comparison shopping between what you find for these versus a mini PC + eGPU setup. Don't forget to consider the cost of the BC250's idle draw if you don't want to cold boot each day/use. I wanted a machine that could be a media client, do some modest gaming, and to experiment with AMD and unified V/RAM. I ended up with one that can do that and some AA/A, so I'm satisfied, despite the quirks.
Lately I’ve been experimenting with different desktop monitor setups, primarily for productivity-focused work as a systems engineer (coding, writing docs, Slack, email, terminals, etc.). Over the past few years, I’ve rotated through:
• 3× 24” 1080p monitors
• 2× 24” 1080p monitors + laptop display
• 1× 32” 4K monitor + laptop display
• 1× 32” 4K monitor
• Laptop display only (on a stand)
Surprisingly, I’ve found that I feel the most focused and productive when I use only my laptop display and rely on Alt-Tab to switch between apps.
With larger monitors or multiple displays I start to feel scattered. It almost turns into sensory overload, and my focus drops off.
Has anyone else experienced this? Do you find that larger or multiple monitors decrease your productivity? What setup works best for you?
Looking to buy a new laptop, and of the model I'd like (thinkpad carbon x1), it seems like I can choose one with or without an NPU.
My surface-level understanding is they make built in AI processing and a couple other niche uses more efficient. Flip side, they're maybe a marketing gimmick?
Price aside (price difference doesn't seem too great), I'm wondering: should I buy a model with an NPU to help potentially future proof? Are there potential downsides to an npu model? Upsides?
I know there are lots of technical people here, I'd love to hear your thoughts or experiences!
I recently “upgraded” my wife’s computer, since it was about 7 years old and I think the WiFi chip in the motherboard was starting to go (and the motherboard wasn’t Windows 10 compatible either, and she wanted to upgrade to Windows 11).
Of course, upgrading the motherboard to the latest WiFi standards meant upgrading the CPU (also swapped from Intel to AMD), which resulted in getting new RAM as well (a rough time for that, given the prices).
All of that to say, I’m now sitting on a mostly functional old motherboard, cpu, and ram. Basically an entire computer sans case and power supply (I’m sure I have a hard drive laying around somewhere).
Any thoughts on what I could do with it? I’d thought of trying to build out a NAS (or some other home server of sorts), but I’ve been thinking that for 2 years and haven’t done it yet because I haven’t really found a “need” for one. I basically just use my computer for gaming, and I don’t really have or plan to have media collections with seem to be the main use case of a hobby NAS.
I've never actually put in more fans than what a case comes with, but I have an unraid server that is running hot so I got a pack of 5 fans to put in it.
From what I understand, you want them set up so that there is a solid airflow throughout the case; ie I'm planning to set it up so that the front and bottom fans are intake and the top and back fans are exhaust, so that cool air enters from the front/bottom and exits out the back/top.
However, one of the fans will be going on the side door. I'm assuming this wants to be intake as well (so that the airflow goes through the entire case, as I assume it would disrupt the airflow as exhaust). Or would it be better to not have one on the side and just have an extra fan laying about?
This is how I plan to set it up (shout out to MS Paint): https://ibb.co/KcXx5cgW
Note: The X's are because the installed chassis block being able to put fans there; the bottom one is especially disappointing as it's the HDDs that are mostly getting hot
Just wanted to confirm that that set up looks good and that intake for the side one (where the ? is) is the proper choice
So I bought my SP3 in '17 as an old-ass student attempting to graduate. It was amazing as I was able to disable most cloudy things (nothing like today with 365 and the general cloud storage), but still use it as a laptop, and finish up my degree. Since then, I've swapped to Linux and wanted to do it too (did it briefly with Ubuntu, but it was still pretty rudimentary back around '19... no touch screen, not even bloaty, was a bit too small of a UI -- can't remember which DM I used, though I know it wasn't xfce which I prefer when I use a DM, though I use i3 on my desktop).
That being said, it seems like there are great options for the Surfaces now, but for newer options. So I wanted to ping y'all and see... have you used Linux on any Surface, and preferably, would like to know for the older version.
I hear Manjaro has gotten a decent option, as I know they have the PinePhone (which I own one but... I haven't had time to mess around with, sadly). I'm not really looking for the touch screen but as it seems the blutooth is dying on the Surface (possibly unrelated or due to the latest Windows update that has borked so much - I have a firewall that prevents/shuts down a lot of Windows "protections" so I may be the culprit but I prefer to think that if I can't do what I want with what I own, the software is the problem), whatever will make it rejuvenate would be appreciated.
Honestly, it's had an awesome battery life (it can be in standby for a week and lose about 1/3 of the battery), and overall, I feel it's the last best thing Windows ever did. That being said... does anyone have a Surface and would you have recommendations (for any Surface)? If so, why, what distro, and what might you want to share?
Thanks in advance!
I am looking for a new mouse, and I am overwhelmed by the choices.
I would be grateful for recommendations.
First, will a USB 2 mouse work in a USB 3 port?
What I would like in a mouse:
Thanks for any input.
Edit: Thanks for all of the replies. I read everyone. I decided to go with something cheap and basic since people told me my current mouse that does unwanted clicks is likely just worn out.
My (older, now) computer has started having issues with the WiFi cutting out.
I looked at the connection strength and saw it was sometimes dropping to 0, so I picked up a WiFi extender, and now it’s signal strength is usually around 70% (Windows only shows a percentage). However, even while monitoring the strength via a PowerShell script to watch the connection strength, it still drops out while the connection strength is > 70%. When it “drops out” I’ll run a speed test and see that it is basically uploading/downloading with kbps speeds instead of Mbps.
My other devices in the same room don’t seem to have any issues, so I’m wondering if my antenna or WiFi card (built in to the motherboard) are just failing.
I know PCIe WiFi cards are better, but unfortunately, as it’s an older computer (can’t even support Windows 11), the motherboard only has one PCIe slot that is in-use by the GPU.
So, any suggestions for a USB WiFi card that actually works? (Or additional ways of troubleshooting a failing wifi connection…)
My MSI motherboard recently had an audio issue and crashed/corrupted my PC.
I RMA'd it and did a fresh install of windows.
I fire up my PC - no internet. After some fiddle-fucking around, I try an Ethernet to USB-C adapter. Works fine.
I try a wifi dongle, no issues.
Okay, motherboard issue related to the Ethernet port then, right?
Except, I plug my Ethernet cable directly into my modem, and now it's working totally fine.
Hmm, router issue? But why is it working with the usb-C adapter? Why does it work when I plug it into my steam deck? Factory reset. No dice.
Drivers updated, windows updated, everything has been disabled, re-enabled, reset, turned off and back on, etc. I'm losing my mind.
I would really like to be able to plug my expensive PC directly into my router via Ethernet, but I can't seem to make it happen. Tried two different cables (which work with other devices).
When I connect, it says it's identifying network and then gives me a 169 IP address - DHPS error then? But why wouldn't that be resolved by the clean install and the factory reset?
Everything is set to auto in terms of IP and DHPS. Everything is enabled as it should be. No firewall. No security. No blacklisted devices. Why won't my router assign an IP address to my PC when connected directly via Ethernet? And why is it working fine when connected to my modem?
msi motherboard and TP-link router by the way.
Edit: Alright folks, I'm just going to squeeze in a network card. I don't want to do another three weeks with no PC and this mobo is just old enough that I don't feel like RMA'ing repeatedly unless I have to. I really tried everything and have ruled out the router and Ethernet cable. Thank you all so much for your help.
Edit: Threw a new network card in. Used my second PCIEx16 slot. Nothing will fit there anyway since it's microatx and my gpu takes up so much space. Working great. So probably the mobo having an ethernet defect - not terribly surprising considering this was just RMA'd and they sent me back the same mobo after repair. If it shits the bed again, I'll just get a new mobo entirely. it's not an expensive one luckily. Thanks again everyone!
[Edit] Details on the plan as it stands are here, potentially using one of these heat pumps.
Looking for advice before the weather starts to warm up! I'm running multiple GPUs for dev work in my small home office, and it's pretty much equivalent to having a fan heater running all day. Right now that's actually a bonus, but it really won't be in a couple of months.
The big heat generating components are all water cooled - partly just to fit them in a sensible amount of space, and partly because I figured I'd end up with exactly this problem and being able to physically pipe the heat elsewhere (ideally outside) would probably be necessary. The bit I'm trying to figure out now is how to actually make that happen...
Ideas so far:
Stick an air duct on the back of the radiator and hang the duct out of the window: straightforward but messy, may be counterproductive depending how hot it is outside and how well I can rig up some kind of baffle between the open window and the duct.
Put the whole radiator outside and drill a couple of small holes in the wall for the pipes: this was my first thought, but PC radiators and fans definitely aren't rated for outdoor use, and I'm not sure where to start looking for something that would be designed for that while still being suitable to hook up to the computer waterblocks. I'm also concerned about condensation on the electronics if the coolant gets below indoor ambient temperature overnight.
Set up some kind of actual exterior radiator (or heat pump?) outside, and use a heat exchanger between that and the PC cooling loop: seems more like the "proper" way to be doing this, but it's well outside my area of expertise and feels like there would be a lot of potentially expensive stumbling blocks. Also still has the condensation problem, I think.
Just crank up the air conditioning: I'm not actually sure if the unit I've got has enough capacity, and it definitely seems wasteful to heat up the air and then use more energy cooling it again rather than dumping the heat directly outside, but maybe I'm wrong there!
I'm in a kind of awkward middle ground: I'm running enough hardware that this is getting to be an issue beyond what you'd get with normal end user setups, and I'm willing to put some money into fixing it (it's affecting my job and my home, after all!), but I'm self employed and nowhere close to the industrial or datacenter scale that tends to come up when searching for solutions.
Has anyone dealt with this themselves, or come across small office/homelab scale solutions that might work?
My memory kit is G.Skill Trident Z5 RGB 32GB (2x16GB) 5600 CL36 Black. The CPU is i9-13900KS on Gigabyte Z790 AERO G.
I noticed that memory price has been dropped significantly so I think I might upgrade to 64GB.
Online information seems to be conflicting regarding XMP and dual/quad channels, so I'm asking for advice here:
From what I understand doing any of those options might cause XMP to not work and it'd be the best (but costly) to have 2x32GB as the only sticks in the system.
Previous topic - https://tildes.net/~comp/1jsx/my_even_smaller_keyboard_upgrade
I'm making this a new topic because this keyboard once again got me to think about a couple of interesting things in regards to both having a smaller keyboard and how to actually make that work. Plus while niche as hell I'd like to contribute some sort of topic to tildes every now and then. For this one i'll be rambling about some of the reasons I've stuck with these things, and the sorts of design concepts it's forced me to think about and problems I ran into (like where the hell the shift key is).
1. Power users and the Nav cluster -
The nav cluster is the Home/End/PgUp/PgDwn/Delete/Insert section and maybe the arrow keys below it on a standard fullsize keyboard. These keys are SUPER useful for text and other sorts of navigation, to the point that it seems most "power user" systems(IDE's or even things like vim, or vimum for browsers) just remap the functionality to somewhere that can be easily reached.
In fact moving the nav cluster and numpad to be somewhere easier to access, so i wasn't constantly moving my hand back and forth, was one of the main reasons I started looking into custom keymaps and eventually smaller keyboards. Being able to trivially hit Home/End without lifting my hands is just so much nicer.
I mention all this to show you the kind of thinking that originally went into me going down this rabbit hole.
In essence:
I wanted to type/navigate faster, oh you can use these keys to be faster, but wait, i'm only a little bit faster and it's MUCH more annoying because I constantly have to move my right hand back and forth, how do I stop that?
Thus i'm always somewhat surprised at how vehemently people can get about remapping keys. Having Up/Down/Left/Right on I/K/J/L with Home/End/PgUp/PgDwn on U/O/Y/H is super intuitive(right handed WASD, with home/end/pgup/pgdwn in line with their corresponding movement) and makes flying around the screen so much easier, and can also open up keybindings that were otherwise used with just porting all this functionality to keys you can easily hit.
2. Chords, and the first major problem -
I'm sure there's a more technical definition but for the purposes of this topic chords are anytime you're hitting one or more keys at once. Shift + a is a chord for A. Ctrl+Shift+Esc is a chord for opening the task manager on windows.
One of the things you don't instantly think about when you get into smaller boards is what chords are popular, and how adding layers to your workflow will affect them. You really want your modifier keys to be accessible at all times, and in a way that makes sense. I don't have a problem that since my Esc key is not on the base layer, the Ctrl+Shift+Esc becomes Ctrl+Shift+Space+Tab for me. To break that down, Ctrl+Shift are on all layers, Space, when held, is the modifier to go to one of my other layers, and on that layer tab becomes esc.
In short, I've added one extra key to the chord, and it doesn't bug me.
What DID bug me, was that with this smaller keyboard, I no longer had room on the left side to put all of those modifier keys. You'll notice that the chord can be easily hit with your left hand alone, and with my previous map, I had shift on the right side. So now I need two hands to hit this chord instead of one. Oh well, right? It's just one chord and I need to use both hands...., whatever?
3. Oh yeah, the mouse......oh shit -
While I do think that more software should be written to allow mostly keyboard interaction, the mouse still serves a useful purpose in my ideal world. Being right handed, I use my right hand for the mouse. Sure I have some mouse functionality bound on one of my layers, but that's not going to replace the speed and precision of the mouse.
And that brings me to Win+Shift+S on windows for taking screenshots. Or more precisely, for selecting an area to take this screenshot....using the mouse.
First off, if you didn't know about this chord and you're on windows, please use it, it's fantastic for those quick "no i mean this" moments where you're trying to send someone a picture of a problem.
Second, this chord SUCKED on my new keyboard layout. On any of my previous keyboards including a normal one, I could hit this chord with just my left hand alone, while I moved my right hand to the mouse to quickly select the area I wanted and then edit it (often drawing red lines around the buttons I needed someone to click on...again....as mentioned in the documentation......).
My new layout had shift on my right hand, and oh dear god did I quickly realize how many other little workflows suck when you need to use both hands to hit the chord and THEN lift up and move it over to the mouse. Most importantly, multiple line/file selection, now required me to move my right hand to the mouse, and my left hand to the right keyboard, so I could hold shift and select things.
Or in overly dramatic terms, lo i had flown too close to the sun and was falling!
4. Wandering in the dark -
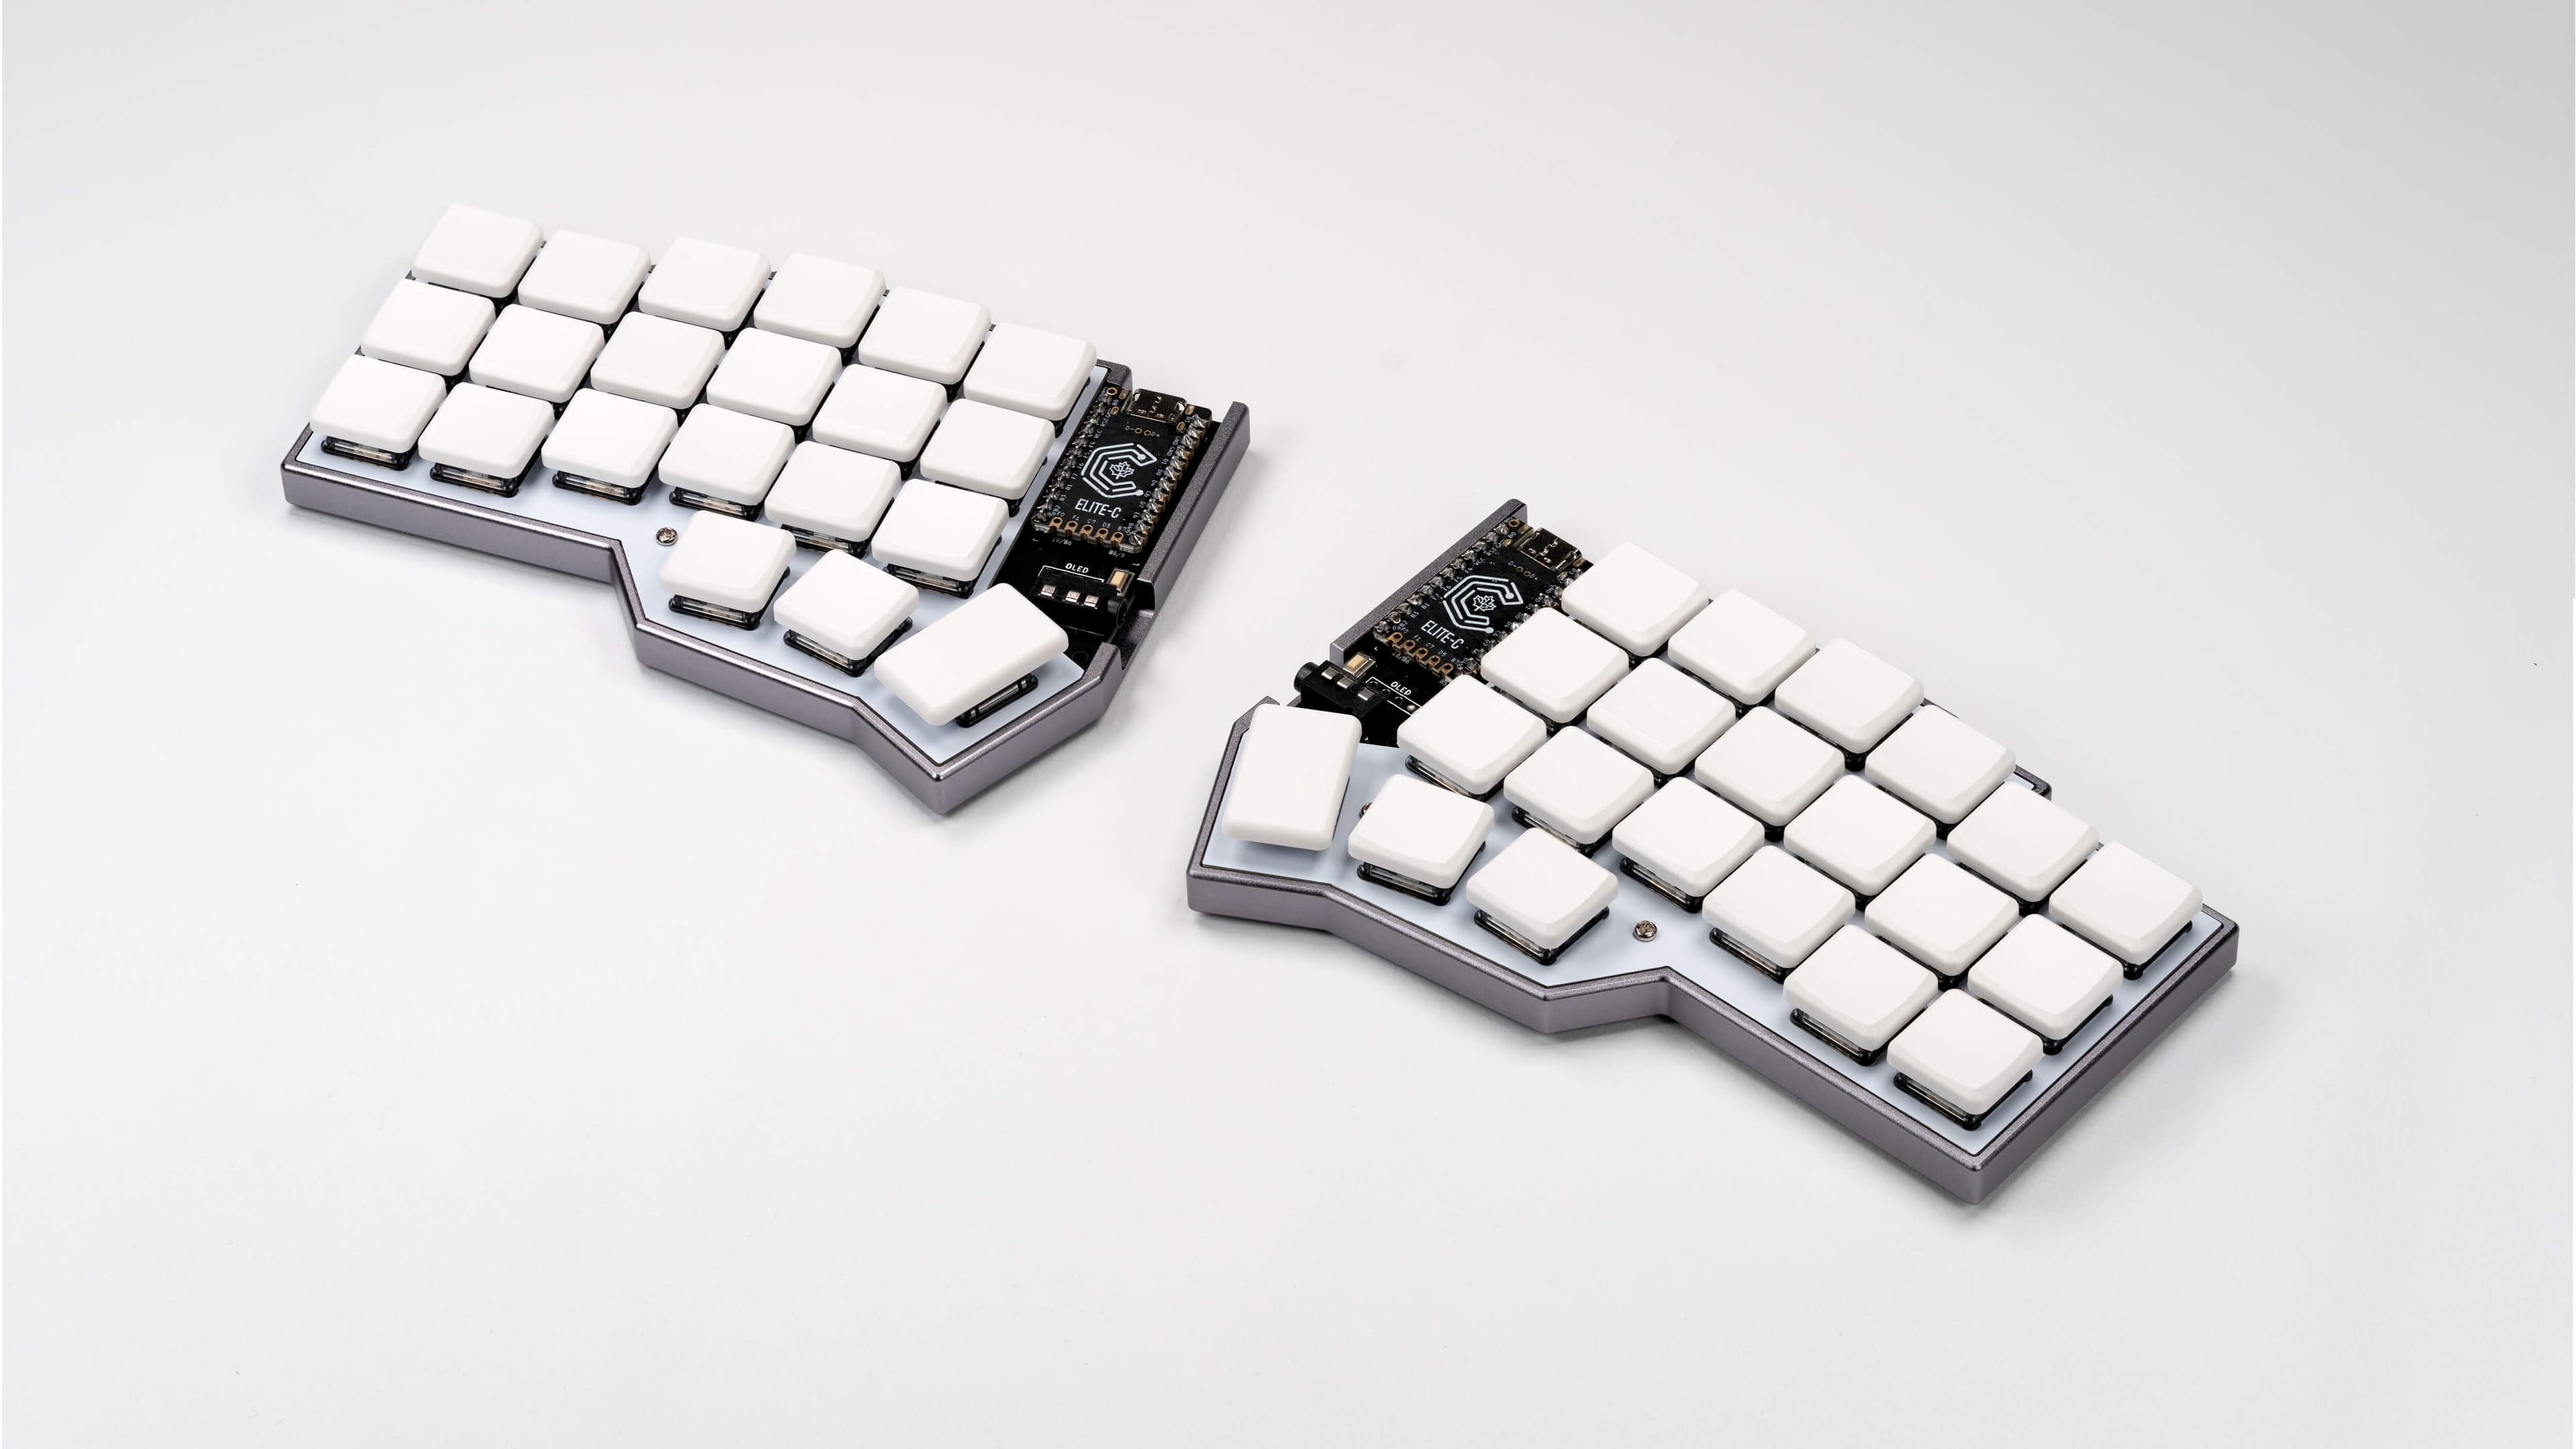
For those that for some reason don't have the 5x3 Chiri CE physical layout memorized, here it is (bottom one).
First try:
Move shift to the top button of the left thumb cluster. This was currently tab, but clearly I needed shift on my left hand more. Tab cold go on the right middle, where shift had been, and shift can go where tab was. Problem solved.
No good. That key is often hit with my index finger instead of my thumb, making something like shift+t/g/b super annoying. Hitting that key with your thumb actually requires a shifting of your hands position, and thus feels unnatural.
Worse, the key below it is my space/layer button, so something like shift+ctrl+left, to select previous words(left in this case being space + j), was super uncomfortable to hit. Just moving my thumb up to hit both keys at once did not feel good as I couldn't properly apply pressure and it just felt weird, but I wouldn't be shocked if some people out there are comfortable with that.
Second try:
Ok, we'll just move one of the other 3 thumb keys on the left to the right and put shift there, probably the win key.
No good. Ctrl and Win (or gui/super/meta/whatever) are just as important as shift. That small cluster being close to each other on normal keyboards, so they're left hand control only, means that almost ALL programs assume as much and have built their default hotkeys around it.
Windows window movement and terminal navigation being two of the bigger ones that affected me. Further this still wouldn't solve my win+shift+S screenshot issue, as now i'm just moving the windows key over there. There's no way in hell i'm putting ctrl on the right side because that's also constantly used in assuming its on the left side for various hotkeys, shortcuts, and other behaviors.
Third try:
It was at this point I was entertaining finally looking into homerow modifiers and setting up tap/double tap modifiers instead of hold. I'm still skeptical of how useful any of that is (but being open minded because of course I was skeptical of all of this and now I preach it), and realllly didn't want to go down that road for all sorts of little workflow reasons I was worried it'd collide with.
5. The solution. Pinkies and two shifts -
This stumped for for about two days after I'd decided I just couldn't live with right shift (there were plenty of other awkward workflow things due to having the number layer key be the leftmost thumb on the right pad). I'd really been trying to practice getting used to hitting both thumb keys with my thumb, as I assumed that might be the solution, and unlike basically every other adjustment I've ever had to make for a keyboard, this just felt rough.
So I took a break and just thought about my previous and normal keyboards. Well, again, in those cases, all these chords assume you're using your thumb for one modifier, and your pinky for the other. Sooooo why not just do that?
Thus the solution was born:
MT(MOD_LSFT, KC_X)
MT(MOD_RSFT, KC_SLSH)
For the few of you who don't have your Via/QMK mappings memorized, this just says that if I tap the key in question, type z (or / for the second one), and if I hold the key in question, treat it as if I'm holding the shift key.
So my shift keys are now used by my pinky, just like normally. I have them on Z and /, so I can easily hold either for whatever chord. If I need something like ctrl+shift+z I can just use the right shift, and ditto for ctrl+shift+/.
Even better, this was already my natural inclination. It only took a bit for me to find out just how much faster and easier this was making things, as I already was used to the idea of moving my left pinky downwards to hit shift. In fact, it was even easier than normal. Every now and then I'll get zi instead of I because I didn't hold the key long enough for it to trigger the "shift" function, and I could get really messy and start screwing with how long the keyboard takes to recognize the difference between a press and a tap, but I'm super happy with it.
6. Conclusion -
My wife is right to judge me and I don't care from my superior position in typing valhalla.
I've been having intermittent problems with selecting text. I'm not sure which software it is in, but it is certainly in Slack and IntelliJ. The text I select will often/sometimes not stay selected once I lift my finger up. It will take several times to make the selection last, sometimes swiping in a different direction.
Is it my mouse or the software?
My mouse in made by Inland, model RTM098( J10 ). Probably very old.
I'm looking to buy a Framework 16 in its most powerful Ryzen config. I'm looking at this being the last laptop I need to buy because of its modular design, so I don't mind the heavy initial investment.
I'm looking to shave of $400-500 by buying parts externally, however. I wanted it to be 64GB RAM, with a 4TB OS drive to run Aurora on, and later on a second drive for another non-immutable LTS distro (probably Debian?).
If I can source the same RAM/Storage, is there any reason to actually buy them from Framework? I'm a bit confused by the huge price difference, since I can get the same memory and storage hardware from Microcenter for about $400 less total.
And if anybody has any experience with the Framework 16 as a daily driver, I'd be interested to hear any stories. I'm not getting the graphics module yet, but may down the road to see if it can replace my desktop fully. Drivers should not be an issue as Aurora has a Framework image that contains everything I'll need.
Can someone recommend a KVM that works? I've been looking for a couple of years now.
Requirements:
Anti-requirements:
Here's the setup showing both computers and the push button switch:
I have tried:
Wendell's Level1Techs Store offers a highly recommended KVM, yet lacks a wired toggle button.
What other KVM switches are available that "just work" and have a wired push button for switching?
The next KVM I'm thinking about trying:
ATEN also has a switch, which is on par with the IOGEAR (4K @ 60 Hz, no EDID):
I am looking to replace my PC that I mostly use for gaming for close to 10 years. While I used to work in data centers, I've never been into building custom PC, particular the planning and research portion on what parts to get.
I am currently eyeing the Corsair build kit, and wonder if anyone has any experience to share.
Thanks in advance.
Pseudo because upgrading some of the parts might have a knock-on effect for other parts. Might end up leading to an upgrade of the whole system, idk. So here's a list of parts that I've already acquired. I was originally going to use some of them to fill out the Framework laptop that I pre-ordered... but I had an expensive couple of months earlier this year and figured I could wait on it. :(
| Part |
|---|
| AMD Ryzen 7 7700x |
| Crucial P5 Plus 2TB PCIe NVMe M.2 SSD |
| (2) 16GB GSkill Flare X5 DDR5 6000 RAM |
| $50 Microcenter gift card |
Now here's what I have in my tower currently.
| Part |
|---|
| Rosewill Thor V2 ATX Full tower case |
| Intel(R) Core(TM) i5-4670K CPU |
| (2) 8GB GSkill DDR3 RAM |
| Rosewill 650W 80 Plus Gold PSU |
| MSI Z97-GD65 MOBO |
| Gigabyte Nvidia 970x Windforce GPU |
| 1 SanDisk Ultra Plus SSD 250GB |
| 1 Seagate HDD 1TB |
I'm looking to keep the tower at the very least and reuse it for new components. Right now, I know that the mobo will absolutely need to be replaced IF I'm throwing the ryzen chip in. And with knock-on effect, probably the psu as well since these components are drawing more power. The goal is to get a solid 60 fps on Helldivers (which I can't do at the moment, even on the lowest graphical settings) since it's the most intensive game that I play. With this goal in mind, does it make sense to start using the components I have from the first list, or might it be cheaper to keep them for the framework and get older (still compatible) parts that would fit right in to the system as it stands?
Whenever smaller keyboards come up online, I often see a lot of the same reactions/dismissals. I've found many of these to be foolish, but also that the community around such devices has its own barriers. It sometimes is represented from its most extreme aspects rather than someone with a more normal approach and use case.
So here is yet another pitch on why you might want to consider trying out some of the smaller keyboards out there, and the various advantages it can bring. This will probably be quite long, but I hope it at least is interesting.
Corne LP split 40 - I carry this with me and use it for work and as a better keyboard for my GPD Pocket 3.
Mercutio 40 - for my lighter media/older/lower spec game machine.
Discipline 65 - for my gaming machine as at the time having the number row still seemed needed (and it just looks so nice)
Velcifire wireless 60 - As my other media keyboard since it's wireless and can be used from anywhere and causes my normal friends and family to have less of a stroke if they have to use it. A lot of what i'll say below won't apply to this as it doesn't have some keys and can't be custom mapped. (It's also what i'm typing all this on, much to my chagrin.)
I've gone through and have owned/own several others but i wanted to be clear about what i'm using in case anyone doesn't have a clue what i'm talking about.
I think the only real "skill" you must have to consider downsizing your keyboard is the ability to decently touch type without looking. If you're the sort of person who still hunts and pecks, no judgement, but this is not for you.
If you're someone who has to code, do data/numerical entry, or type a lot for work, then I encourage you to read on. Those are common barriers I hear thrown out, but in my experience are actually easier with a smaller keyboard.
The normal keyboard for most machines has a lot of dead/wasted space that could just be used better, and has some keys that are important or have grown more important in really poor positions.
The core idea is simple. You can find the home row easily with the homing keys (j/f generally have a bump or some defining feature). You're probably excellent at hitting the keys in relation to that if they're 1 step away from the home row. The farther you are from that, the more likely you'll need to look, and the longer it'll take you to press the key even if you don't. So where possible, it's ideal to try and use space more efficiently to keep the keys you actually need to use near this position.
But how are you going to fit all those keys anywhere near the home row?
As an example, to help explain moving forward, here is the keymap for my mercutio 40.
You'll want to save that json, and then upload it at qmk configurator, which will make it much easier to explore. If you've never looked at this before it can seem insane, but I promise you it's pretty tame ignoring some edge case stuff.
If you don't feel like going through the hassle here's screenshots from the site with descriptions of each layer.
Mostly the same as below but i did fix some missing info below so sorry about that. I'm also leaving the descriptions of my "gaming" layers 4/5/6 in the imgur only because I think that's out of scope for this).
Space is an interesting key. It's a key only ever really tap, never hold (outside of games, more on that later). So, why not double it up, and make it do something different when you hold it?
Well in this case, tapping any of my 3 space buttons gives you a space like anyone would expect, but if you hold either of the left 2, it "shifts" you to layer 1 (base layer is 0), and holding the right one, shifts you to layer 2.
I put shifts in quotes because it's just like the shift key. If you hit 7 on your keyboard, you get a 7. If you hold shift and hit 7, you get &. This is the same concept, and just keep the layers organized in a way that makes sense, keeps it very easy to know what layer what key you want is on.
Ignore the N/A's on this and the rest (where they'll be another symbol), as they are optional keys i don't have. Mute is also the encoder knob so don't worry about it.
It's pretty basic qwerty in the the middle, and tab/left shift/right shift/backspace/windows/the alts/right control are where they normally are, and left ctrl replacing capslock is something I recommend EVERYONE do.
Space, is still space. In fact all 3 of those spacebars are space...on tap. On hold, the left two "shift" the keyboard to layer 1, while the right one "shifts" the keyboard to layer 2. So just like holding shift + a key gets you a capital version of that key (or a symbol from the number row), holding space + a key gets you something else.
The left control/right windows key are also layer keys. Holding them takes you to layer 3 and they do nothing when tapped.
Finally right shift is where it always was, and is somewhat similar to space. If you tap it, you get /?, and if you hold it, you get right shift instead.
All this to say, that outside of enter, escape, the numbers, and moving control, most people who can already touch type could mostly type on this without any explanation.
Accessed by holding left space.
All keys that don't actually put a character on the screen (ignoring the left side where i've got some coding stuff but it doesn't really matter).
Up, down, left, right, home, end, page up, and page down are all in instantly intuitive positions and make navigating anything quickly a breeze (home on the left side since it jumps you to the left/start of the line, and end on the right since it jumps you to the right/end) . Enter, Delete, and Escape are the other 3 major keys on this layer, as they are of course useful, but don't actually put text on the screen.
The point is that if you're thinking to yourself, "where is that key on this keyboard" and you know that key doesn't actually put a character on screen, you know it's on this layer.
Accessed by holding right space.
I've turned the right side of my keyboard into a numpad that is always under my fingertips(my middle finger is always on 5, just like a 10 key), and since i'm using the number row numbers, I also have access to all their symbols instantly as well by just holding right space + shift. I also have dedicated *,/,+ keys, and the -/_ underscore laid out to be intuitive as well (higher key increases the value, lower key decreases, so multiplying above division, and addition above subtraction)
Finally we've got the rest of the keys that can output characters but didn't make it to the home row and don't fall into the numpad. `, ;, and . Again they are all basically where they normally would be, but instead you just hold right space and hit the key.
The other 5 keys that output text are on the left hand side near the home row because they're super useful for coding (I also use | and -/_ a lot, but their positions in this layout are intuitive to me). Having the paren's/brackets under/near my middle and index finger is so nice for all sorts of coding.
Accessed by holding "left control" or "right windows".
The function keys are the exact same layout as the numbers. F1 is where 1 on my layer 2 is. So F5 is where 5 is which means it's right under my middle finger. I put 10/11/12 going down on the left because that made the most sense to me, and so far has never caused me any issues.
The mouse/music stuff I don't use that often, but it's something I'd like to mess with a bit more.
I threw capslock on here in the rare cases where I actually need the key because some program or game wants it. I also have Insert on this layer in my live map, but I use it so rarely I tend to forget it until something needs it.
Finally you'll notice that on layer 3, where the G key is, is a toggle to put you into Layer 4. Meaning that once you hit it, you'll jump to layer 4 and NOT return to layer 0 when you let go. This is explained more on that layer and is totally bonus points. The main point of this keymap is done, and I think this is an excellent layout for productivity (or at least a starting point), without having to dive into lots of complicated or unintuitive concepts.
If you don't want to read all of that, the basic idea is that your average person can type on the keyboard with minimal explanation. If they forget where a key is, the other 3 layers all follow rules to help guide them. One layer for navigation and keys that don't actually output characters (home/end/delete/esc/et) and one layer for the rest of the keys that output characters, namely the numbers, which are then also your numpad and ALWAYS under your right hand, centered and ready to go. The final layer is, mainly, for the function keys, still following the numpad from the previous so you can again easily figure out where the button you want is.
In the end the main benefits i've found are easier navigation, as I essentially now have a navigation layer with every key i could want on it, and much faster access to numbers. I still do data entry and lots of numbers, and having the numpad always one keyhold away is awesome.
On top of that it's just nice to not have to move my hands so much to type, and to get so much of my desk space back.
I type just as fast as I do on a normal keyboard for basic text, as there's almost no difference, and I type faster doing code/editing text because my numbers, brackets, and navigation keys are all closer at hand and in such a way I don't need to look or even move my hand from the home row to hit them.
On the typing side, honestly yeah. I've seen a lot of excuses like "well i prefer a numpad" or "how do you type numbers" which I've tried to address in this post.
The only issue i've run into is gaming, where I already really solved most of my problems as shown in the extra layers in the imgur gallery, and think it might even be better for gaming vs the normal layouts.
The only remaining hassle is roguelike games such as stone soup or caves of qud, which LOVE to assign every fucking key a use so there's no easy way to remap things and I have to actually add another layer JUST so i can hit the numpad numbers because I need them to navigate....
BUT unfortunately, you might actually want to acquire one of these keyboards, and that's where stuff gets a little tricky.
All the upsides I just mentioned assume you can actually program the keyboard. Thankfully this has gotten much much easier with both Via and ZMK making the process very simple. QMK is doable, but difficulty wise it shared a lot of similarities with trying to get the perfect modded run of Fallout New Vegas going with about 20-40 mods. If you are not more comfortable in the tech world, I recommend ONLY boards that support via software. I believe these days anything that supports QMK supports VIA, but it's worth checking on the via website to make sure the board you're about to get works.
The mercutio and the discipline I built myself after ordering the parts. They're through hole soldering and were some of the first soldering I'd ever done on my own outside of a quick kit I bought off amazon to practice. It is actually not that hard BUT you need the equipment. It's not horribly expensive to get but it's not cheap either. I do really enjoy just throwing on music and putting these together, but I totally understand that you might just want to, you know, buy the fucking thing already built.
Thankfully many sites offer build services (or you can find them on etsey) which charge a fee to assemble it for you. This is what i've done with every corne i've ordered because it is NOT through hole soldering and I don't have the guts for it, and even still they've all had some eventual issues (although again, i carry mine with me in a very unprotected state because i'm insane so some of that is on me).
Especially if you're paying for the aforementioned build services, these things can get into the 200-400 range FAST, which is a lot for a keyboard. There are some cheaper options out there, and the Mercutio was only $70ish before switches(not bad) and keycaps (range from dirt cheap to ungodly expensive).
Still I would not recommend ANY of these for a first time buyer. My first smaller board was a 60% mechanical and those range from $70-100 these days from what i'm seeing.
Sometimes you just won't be able to find or buy the board you want in the way you want. There are lots of interesting boards i've seen over the years, but they're either very expensive or only open for a limited time. I had a working cornish zen that died on me. I'd love to replace it. I cannot as they currently don't sell them. Will they make more? Dunno. I hope they do.
I DO NOT recommend diving in head first and suggest starting with something simple like a 60 or 65, probably keychron, as they're a decent budget brand. You might want to go even cheaper with just a 60% off of amazon that isn't even programmable just to see if you outright hate it, but I do think that getting something you can start to tweak as you begin to understand what you want helps adoption.
I hope this gave some of you the push to look into all this. I'm glad I dipped my toe in it, less glad about the absurd amount of money i've spent on it (dear god keycaps), and really glad about the moment where I thought "huh i really just don't need all these keys" and pulled some out. I hope I can convince a few others give it a shot and hopefully see the same results. No dvorak or home row modifiers and weird triple tap macros. Just some layers and common sense.
I do still, if nothing else, highly recommend switching left control to caps lock.